Thursday, October 28, 2010

Birthday Gift

Well, as I told you-my fabric department is lacking majorly.  When I wanted to work on sewing projects I had to borrow my grandma's sewing machine...NOT ANYMORE...

For my birthday, my parents got me this:
I can't wait to start using it.  I just have to clean up and make some space for it:)

Wednesday, October 27, 2010

Halloween Candy Jar

I saw this on makeit-loveit.com and I thought it was a good idea.  I don't have kids so I couldn't use baby food bottles, but I have been saving old spaghetti sauce bottles.  It worked out just fine.  Instead of using fabric (I'm lacking in that department majorly), I found a cute clip art of a pumpkin online and printed that off.  I did one for the lid and one for the bottle.  Then, I found a raffia ribbon and mod-podged that to the side of the lid (so you can't see the ugly gold color)...


What do you think?  It was super simple and now I have a little Halloween or Thanksgiving treat in my front room:)

Total Cost: FREE:)
Total Time: 30 minutes

Another Older Craft-Dinner Tile

I think I saw this on makeandtakes.com or makeit-loveit.com, but I've seen it done a lot.  People get a big tile, put vinyl letters on that say "Dinner" or "Menu" or "To Do" and then write on it with a dry erase marker.  Well, I don't have a vinyl cutter, but I had a small white tile and a little bread dish that had pink birds on it...so here's what I did:
Granted, this photo's a little outdated (I mean, who's having a pool party in Utah when it's snowing outside?).  It actually has helped a lot.  I had that green card stock so I cut it out and mod-podged it onto the tile and the bread dish to bring in the greens in my kitchen and to coordinate with each other.  I think it looks better than just a plain white tile...

Total Cost: $1-$2 for tile
Total Time: 20 minutes

Tuesday, October 26, 2010

Current Project

I got this shelf from a roommate way back in the day...she used it to put her shoes and boots on.  After college my parents stored it on their patio and used it for pots and gardening tools.  It's had its fair share of use. 

When I got married and moved into our house, I took it down to my laundry room and I've  been using it to store my laundry supplies.  That room is gross as it is...
that paint shelf on the left is gone now...helps a bit to clean the place up...

and looking at this dirty shelf doesn't help. 


 See, it looks pretty gross huh...


So, I decided to refinish it.  I thought I'd sand it and then paint it, but come to find out-it's particle board...not really sand-able.  I repainted it (using the primer and spray paint from the pots).  It looks better, but it still needs some work.  There are some rough spots....

I went to Wal-Mart (man, I go there a lot...) and bought a yard of fabric for $2.97:

Now, when I've got some extra time (who knows when that will be), I'm planning on mod-podging it to each shelf.  I'll get some organizing boxes from Dollar Tree (seriously, sometimes there are some REALLY cute ones there) and put my laundry supplies in there.

I'll definitely be posting pictures of it when it's all done, but I thought it'd be fun to document where I am as of now...

Any suggestions on how I could (cheaply) fix up that dirty looking laundry room?  It's in the basement and has one small window...

Current Cost: $3 for fabric
Current Time: approx. 3 hours

Long Ago Craft

Like a year ago, one of my pooka necklaces broke.  It was a bit too long anyway so I thought why not try and use the extra shells for something.

A lady at work had some extra beads and let me have them.  After a quick trip to Wal-Mart and a cheap purchase of a simple jewelry kit (I can't remember how much it was, but probably under $10), this is what I came up with:

this was the necklace...
 
earrings set 1

earrings set 2
It took like 10 minutes, not long at all.  And now I have two new pair or earrings that match actually a lot of my wardrobe:)

Total Cost: about $10 for the kit
Total Time: less than 1 hour

Door Decorations

I've seen this done before and I thought it was a cute idea.  I'd seen the letters at craft shops before so I headed over to Michael's to grab one.  Guess what-they don't carry them anymore. Neither does Wal-Mart.  Dead end?  Nope. 

My grandpa has a wood shop and I thought, if I can find a cute font that wasn't too elaborate that he could cut it out for me on his jigsaw.  I looked around and played with WordArt.  This is what I came up with:

I played around between Word and Paint, making parts of it wider, taller, shorter, flatter, etc.  When I was done I saved it and emailed it to my grandpa. He printed it off and cut it out of oak:
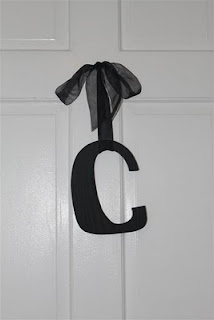
It was so pretty I wanted to leave it and just stain it.  But I painted it instead:
After I finished painting it I found a black ribbon that I'm sure was on some wedding gift.  I tied it in a bow and hung it on the nail that's in our door.  I noticed the back of the letter was scraping a bit on the door and leaving black paint so I mod-podged the back.  When it was dry, I liked it so much (the shine) that I mod-podged the whole thing.  I thought about sanding the edges, but I decided I like the shiny look better. I haven't taken a photo of that yet though...

So, there you go.  This project cost me 99 cents (for the black acrylic paint).  I already had the mod-podge, the brushes, the ribbon. 

And it's great too because I can add different color ribbons for different holidays!  I think it is a good little door decoration for any holiday:)

Total Cost: $1 for paint
Total Time: 1 hour

Canning...

My friend and I decided we wanted to can the numerous peaches and tomatoes we had.  It was actually a pretty simple process, just time consuming.  After canning, labeling and dating them I put them into storage.  Then I got this idea....looking at the lids and the permanent marker on top wasn't the funnest...what if I dolled them up a bit...

I created lid labels with a picture or the food, typed what they were and the date they were canned.  Then I created jar labels with the same information.  I could have printed them on adhesive paper and stuck them on, but I used mod-podge instead.  This way, when we're done with the food in the bottles, all I have to do is wash them (as I would anyway) and the label is gone.  The bottle's ready for another round!

Here is what I did:
The grape juice we did last year, but I figured I'd like all the bottles uniform.  I think it makes them look just a bit better rather than seeing hand writing on the lids...

Just me though.

Total Cost: $13 for peaches and seals
(got the jars from a girl in the ward, they had food in them so I emptied them and ran them through the dishwasher a couple times)
Total Time: approx. 4-6 hours
(my friend was kind enough to let us can at her house and once they were boiling, she let me go home and get some rest)

Repainting Pots

I went on this kick of redoing my house-the simple way (accessories).  My sister was getting rid of some old pots and we had just purchased a new plant.  I wanted to stick the plant in my yoga room, but the pots didn't match.  The end? No.  I bought some primer and spray paint from Home Depot and went to work...

Here you go:


a gray color.  It took one coat of primer and 2 coats of white...


Took it into the room, added a couple bags of black stones (bags were $1 at Dollar Tree)

There you go.  The plant was maybe $10 at Smith's Marketplace
And there it is.  Simple yet  looks so much better.  I'd say that was an under $15 (you have to include the plant, the tray, the trivet, the rocks, and spray paint).  It adds just enough to the room!


Total Cost: $12 (including spray paints and rocks)
Total Time: 2 hours (let paint dry and re-pot plant)

New Blog

I guess I'm on a kick of online-documentation.  Less than a month ago, I created a blog to document recipes I try.  Now, I created this to document the crafts I do...what's next?

Well, here we are.  As you probably know, I've been really busy with play practice, but that is quickly coming to a close.  It kind of scares me it's coming so fast!  Less than three weeks and it's OVER!  Wow, time flies.

I'm going to have a LOT more free time on my hands and I think I'm going to start working on more crafts.  I've been kind of lucky to work on some recently-my one or two days off from rehearsal.  So, here's what I've done...