Showing posts with label Thanksgiving. Show all posts

Monday, November 20, 2017

Great-Grandma's Rolls


 Ever since I can remember, these have been at our family dinners.  My grandpa spends hours making them for us because he knows how much we love them.  They are fluffy, the perfect amount of golden, and get devoured.


A few years ago I decided to ask him for his secret recipe and see if he would let me make them with him, so I could find out all his little tricks to making the perfect dinner roll.  He was happy to help and he told me the first secret about the recipe.

For as long as I can remember we've called these "Grandpa's Rolls" because he always made them.  I just figured it was his recipe, or handed down from his family.  But it actually came from my grandma's family.  Her mother was the one that would make them.  I saw the original recipe, all marked up with my great-grandma's writing, smudges here and there, a few butter stains and bits of flour caked on.  It was magical. We started making the rolls.  It was such a special day for me.

As you know, rolls take awhile to make.  It's not a quick throw ingredients together and toss them in the oven.  They take time, they take patience, they take care.  It was so fun spending the entire day with my grandpa, talking with him about memories from when he was a kid, seeing him work with his hands, taking such care to knead the bread.  I'm so grateful I got to share this day with him, to learn from him, to learn about him.

Okay, let's get to the recipe shall we?

Here's what you'll need:
.3 eggs
.1/2 c. warm water
.2 Tbs. yeast
.2 Tbs. sugar
.3/4 c. sugar
.2 c. milk
.1/2 c. butter flavored shortening
.7-7 1/2 c. flour
.2 tsp. salt

The easiest thing I've found is to use my three Pyrex liquid measuring cups and my Bosch.

1. In a 1 c. measuring cup whisk eggs until frothy
2. In a 2 c. measuring cup combine water, yeast and 2 Tbs. sugar, let sit until foamy
3. In a 4 c. measuring cup combine remaining sugar, shortening & milk.  Microwave 3-4 minutes until shortening is mostly melted.

4. Put 4 c. flour into your mixer.
5. Add your eggs, milk & yeast and knead for 1-2 minutes.

6. Cover & let sit until dough reaches 1" from the top of your bowl
7.  Add salt 3-3/12 c. more flour and knead 3-5 more minutes.  Then remove beaters and smooth dough around bowl.
8.  Cover and let rise to the top of the bowl again
9.  Pour all the dough onto a greased countertop.  I love working with this dough.  It is not sticky, but so pliable.
10. Roll dough so it's about 1/2" thick.
11.  Cut 3-3 1/2" circles out.  Fold in half and pinch edges together.  Place on greased baking sheets (about 12-15 per sheet depending on size)

12. Cover & let rise one more time about 30-45 minutes
13.  Remove towel, bake in oven at 350 for 14 minutes, turning at 7 minutes
You're done!  Pull them out and let them cool, or be like me and start eating right away!


Seriously, these rolls are divine! I prepped ahead for Thanksgiving, and now three out of my four bags are in the freezer so I don't scarf them all before the big feast!

I hope you love these rolls as much as I do, and find joy in making them, just as I do.  Make them with your family, make them with your friends.  Make time to make memories as you do so.  It's so worth it.

Happy Thanksgiving all!


Great-Grandma's Dinner Rolls:
.3 eggs
.1/2 c. warm water
.2 Tbs. yeast
.2 Tbs. sugar
.3/4 c. sugar
.2 c. milk
.1/2 c. butter flavored shortening
.7-7 1/2 c. flour
.2 tsp. salt

Directions:
1. In a small (1 c.) bowl/glass combine eggs & whisk until frothy, set aside.
2. In another small (2 c.) bowl/glass combine water, yeast & 2 Tbs. sugar, mix & let sit until foamy
3. In a medium (4 c.) bowl/glass combine 3/4 c. sugar, milk & shortening.  Microwave 3-4 minutes or until shortening is mostly melted.
4. In a mixer pour 4 c. flour.  Add eggs, yeast & milk.  Knead 1-2 minutes.
5. Cover & let rise until dough reaches 1" from the top.
6. Add salt & 3-3 1/2 c. more flour. Knead 3-5 minutes.  Cover & let rise again to top
7. Place dough on greased counter and roll to 1/2" thick
8. Cut 3-3 1/2" circles, fold in half, pinch edges and place on greased baking sheets (12-15 per sheet)
9. Cover & let rise one more time (preheat oven to 350)
10. Bake at 350 for 7 minutes.  Rotated and bake another 7 minutes.


Tuesday, November 4, 2014

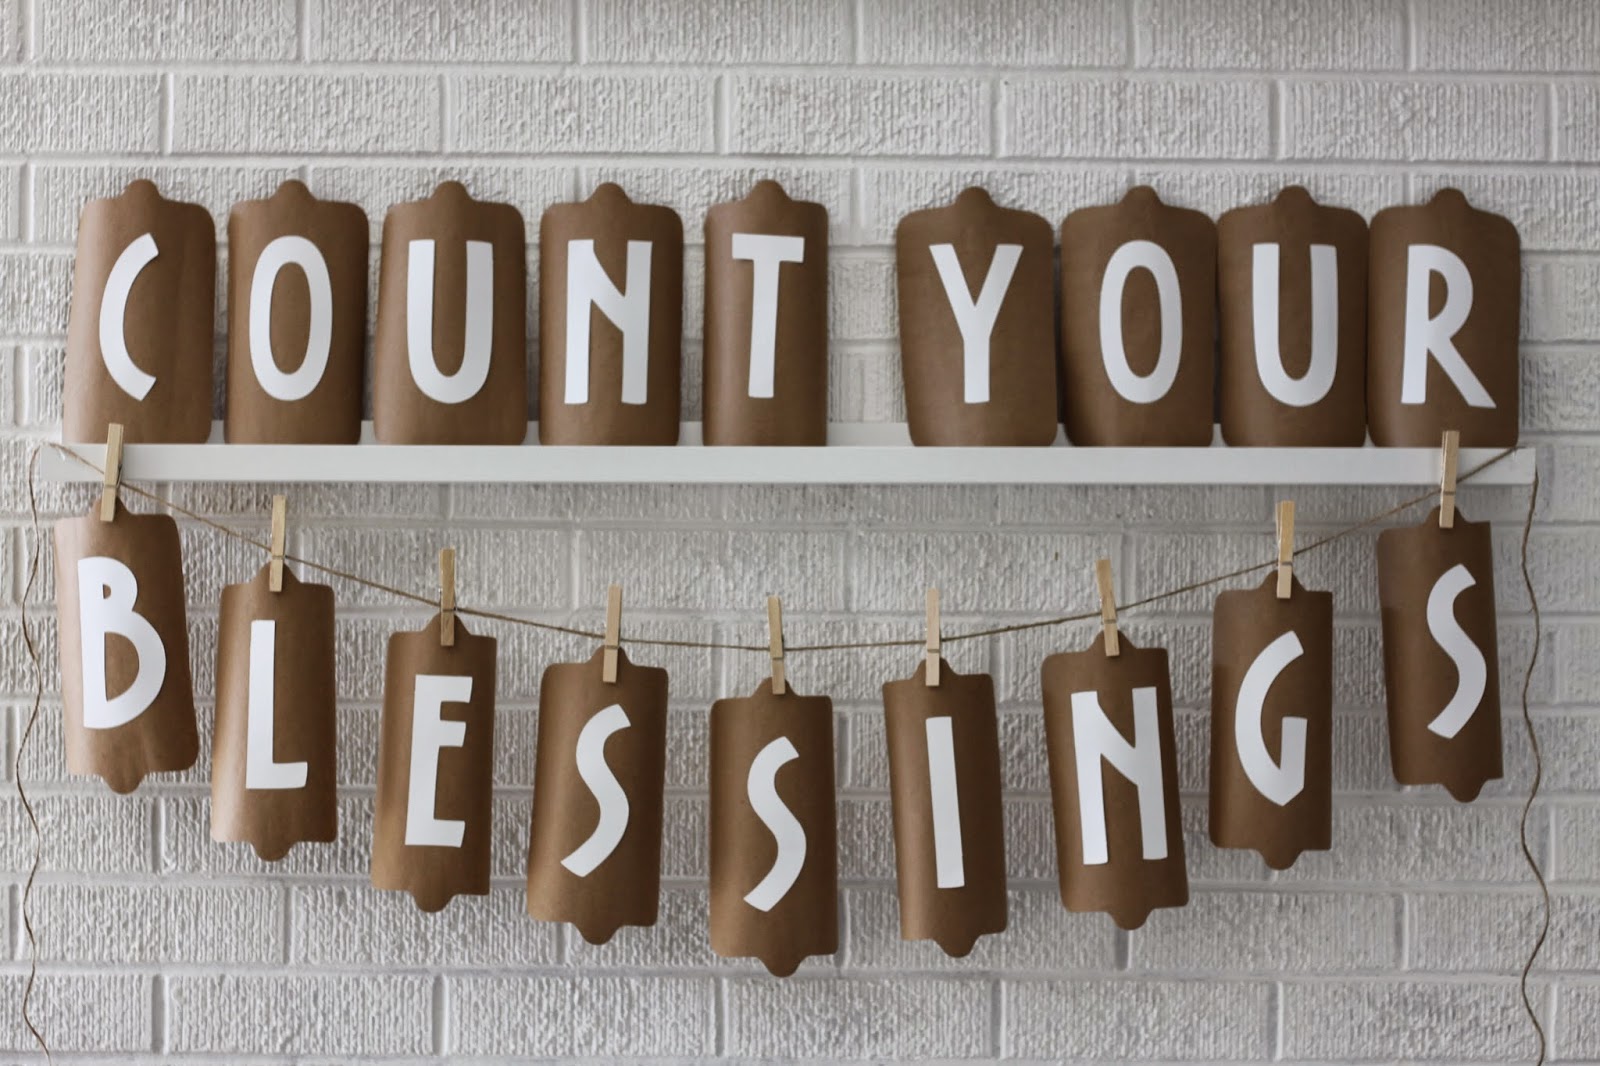
Thanksgiving Banner

Time to put away Halloween & give Thanksgiving some time.

Really, I left my wood pumpkins & candy corn since they are fall decor.  I needed something more though...something simple yet decent.

A banner.  I wanted something faster & easier than burlap, so I thought I would just do card stock.  I rummaged through my scrapbook paper, but didn't have enough of anything but white.  I remembered I had a roll of kraft paper (the heavy brown wrapping paper that they use at the post office).

I used my Cricut to cut out the base shape & words (Cricut Essentials "label 1" and Opposites Attract "Opposite" for the letters).

The brown bases were all a little rounded from being on the roll.  At first I didn't think this would be great, but it turned out to actually be in my favor.

Glue, twine & clothes pins later....


So, there you have it.  I like how they ended up being a little rounded, it gives them a more 3D look * helped the "Count Your" stand up better

Materials:
twine
scissors
paper (card stock or your choice)
tape or glue
tape (for hanging)


Like I said, I used my Cricut machine, but you can easily create or find a template online & cut it out...same with the letters...it will just take a bit more time.

Total time: 1 hour
Total cost: FREE

Thursday, September 4, 2014

Wood Candy Corn

I saw these here & here and thought they were pretty cute.  They looked pretty simple so I gave it a go.

I free handed my own templates, three different sizes.

print as 8 1/2 x 11
Trace onto wood (mine is about 3/4" thick)
 Again, thanks to my grandpa, we were able to cut these out in a jiffy.
Cut and sand


Little painting, sanding, & sealing...


I was about ready to glue them together, when my mother-in-law had the great suggestion of using magnets to hold them together.  Let's be honest here, basically all my decorations end up being toys.  This idea made is so my 2-year-old can actually play with them like puzzles.


My husband used a 5/16" spade drill bit to drill the holes.  Pretty easy.  The tricky part was making sure the holes lined up with each other.

I found the magnets @ The Home Depot for around $6, they worked great.

A little tacky glue & some waiting and now my candy corn is done...


Now these can be fun for the kiddos as much as the adults:) Happy Halloween (or fall, or autumn, or Thanksgiving)...


Thursday, August 28, 2014

10 Step Wood Pumpkins

I know, I know.  I just barely posted about my back to school shelf & now I'm already onto Halloween...

Well, I figured I'd get them out of the way so they'd be ready.  They aren't going on the shelf until October, so don't worry about that.

Anyway.  I have extra wood.  I have extra time.  I like to use both.  I pinned this probably a year ago or so, but finally got around to making my own version.


The pumpkin idea is super cute...and super easy.  Just a 2x4, some paint & a few other things.

Materials:
2x4 scraps
1x1 scraps (for stem)
Hanger (for vine), optional
Craft pliers (the purple & blue) for my project.
Paint, orange, brown & green
Wood of Tacky Glue
Sander & sand paper
Paint brush
Drill & 5/64" drill bit, optional
Hack Saw
Shellac/Sealer

Step 1:
Cut your boards to the size you want.
Mine are 3.25, 4 & 8 inches tall.  Don't forget to cut your stems too.  I did various sizes of what I thought would look good (about 1x1.5x3/4" for the two tall ones, a bit shorter for the small pumpkin)

Step 2:
Sand them down.
I tried to round my edges a bit to get more effect, but do what you like.

Step 3:
Paint your wood.  I used a regular orange craft paint for the pumpkins.
For the stems I combined white & coffee bean to make a brown I liked.

Step 4:
While those are drying, cut and twist the hanger to make the vines.
It wasn't hard, just took a bit of time.  There was a coating on my hanger that kind of peeled off as I was doing this, which was fine, it doesn't matter.

Step 5:
Paint the vines.
I actually used spray paint for these, way easier than trying to hand paint them.

Step 6:
When the boards are dry [if you want a weathered look, sand the edges], take the hacksaw and saw lines down the middle of the pumpkins.  [I actually did this BEFORE I painted...wrong.  Do it after to get the lighter effect that looks better].

Step 7:
Shellac everything & let dry.  I used a sating polyurethane I already had, but you could use mod podge or whatever you have on hand.

Step 8:
Drill holes for the vines to go in (or just hammer them in if your wood is soft enough).
On one end of all my vines, I left about a 1/4-1/2" straight piece that could go into the wood.


Step 9:
Glue stems to pumpkins, let dry


Step 10:
None, you're done!


See, easy & 10 steps..okay, really nine.  It took me about an hour or so to do this & it was FREE since I had all the materials.

Happy Halloween (or Thanksgiving, whatever you use these for)


Wednesday, October 27, 2010

Halloween Candy Jar

I saw this on makeit-loveit.com and I thought it was a good idea.  I don't have kids so I couldn't use baby food bottles, but I have been saving old spaghetti sauce bottles.  It worked out just fine.  Instead of using fabric (I'm lacking in that department majorly), I found a cute clip art of a pumpkin online and printed that off.  I did one for the lid and one for the bottle.  Then, I found a raffia ribbon and mod-podged that to the side of the lid (so you can't see the ugly gold color)...


What do you think?  It was super simple and now I have a little Halloween or Thanksgiving treat in my front room:)

Total Cost: FREE:)
Total Time: 30 minutes