Showing posts with label productive projects. Show all posts

Monday, November 20, 2017

Easy Envelope Pillow Shams


I made a couple of these shams a few years ago, but have since bought another pillow...thus I needed to make another sham.  I searched my old posts to see where my tutorial was...low and behold I never made one.  So I decided to now.  I've seen a few online, but I don't like to cut or sew more than necessary and all the tutorials I saw started with three pieces.  Mine starts with one.

My pillows are 20" x 20" so I cut my fabric 21" x 50" 21" (one side) + 21" (the other side) + 8" (fold over portion)


After this I created a 1/2" hem by folding it twice over on both of the long sides

Then I sewed all the way down these on both sides

Once I did this, I made that same hem on the short ends & sewed them down


Alright, now I had a piece of fabric that was long and all hemmed.  Then I folded it in half (hotdog)

Now I unfolded one side up 10" (to 30")

Then I folded the other end down 10" (to 10")


So now I had my sham the size it needed to be with the fold over fabric centered on the back.
I don't use pins very often when I sew, but I did pin the points of intersection for two reasons.   One-so I knew where they were to keep it even on both sides and Two-so I could make sure to sew carefully over them as they were much thicker than the rest.  

Next I sewed just down those two edges of the hemmed portion, not along the folded edges.

Now, you can flip it and be done, or you can add one extra embellishment, which is what I did.  I flipped the whole thing (right sides out), ironed it and then did a quick little 1/4" hem around the entire thing.  

Now you can put your pillow in and add ribbon or leave them plain.


I added some wired ribbon I found at Jo-Ann.  I really love how they turned out.  I'm kind of obsessed with the ticking fabric (if you haven't seen my Stocking tutorial, I used the tan ticking).


I'm kinda loving how they turned out.  I love the simplicity of the ticking, but added the red ribbon for just a little more color and accent.  I love that they bring just enough red against the Christmas tree.  I love that I can use them for other holidays throughout the year.  And, I love that I got to make them.

Total Time: 1 hour
Total Cost: $23
Fabric: (2 yards with coupon, even though I have tons of extra) $15
Ribbon: $8 (didn't have a coupon)


Saturday, April 29, 2017

Faux Shiplap Wall DIY Tutorial

 Shiplap.

It's all the rage and I love it. I wanted to put some in my home.  My husband dry walled the shed...then we decided to paint...then we decided to try out the shiplap for fun!  I love how it turned out!  We used this tutorial as a guideline and it worked pretty well.

What you'll need:
1/8" MDF panel boards
Nickels
Paint, paint brushes, rollers, etc.
Level
Nail Gun & nails
Sander & sand paper
Saw

1.  We went to The Home Depot, bought the MDF boards and had them cut it there.  When we told him what size we needed, he said, "you must be doin' shiplap."  They'll probably know what you're too:)


We had ours cut into 8" wide pieces.

2.  We came home and sanded the edges and corners.  I used anywhere between 60 and 120 grit sandpaper.  It took maybe an hour to sand all of them.


3.  We started with the first board, making sure it was level and nailed it in place.
[the freshly painted wall about to get covered up:/]


4.  Then (this step is optional and we stopped doing it about a third of the way through) we painted the tops of the boards as we went.

5.  We placed nickels in between the boards for spacing.  You can also use tile spacers, but we had nickels on hand:)

6.  We kept going.  Sadly, we had originally painted all the walls in the shed so we were covering up our nicely fresh painted wall, but I'm glad we did...

7.  Once all the shiplap was on the wall, we filled the holes in with wood putty and mudded the seams.
[you can see how we stopped painting the tops of the boards as we went on]

8.  Then we painted...a couple coats.


[I used a spackling knife to remove any paint left between the boards]

9.  And there you have it!  I just loved how it turned out.


We added this storage/work table as well.  Originally we were going to just use 2x4s for the legs, but once again the husband decided to splurge and do metal legs (which I again l.o.v.e!).  They cost about $50 and again they cut them at The Home Depot (do y'all love that place as much as I do?!).


Happy Crafting!

Total Time: a weekend
Total Cost: $95 (paint and shiplap), $50 (for legs, including brackets for top & bottom of each leg)


Wednesday, March 1, 2017

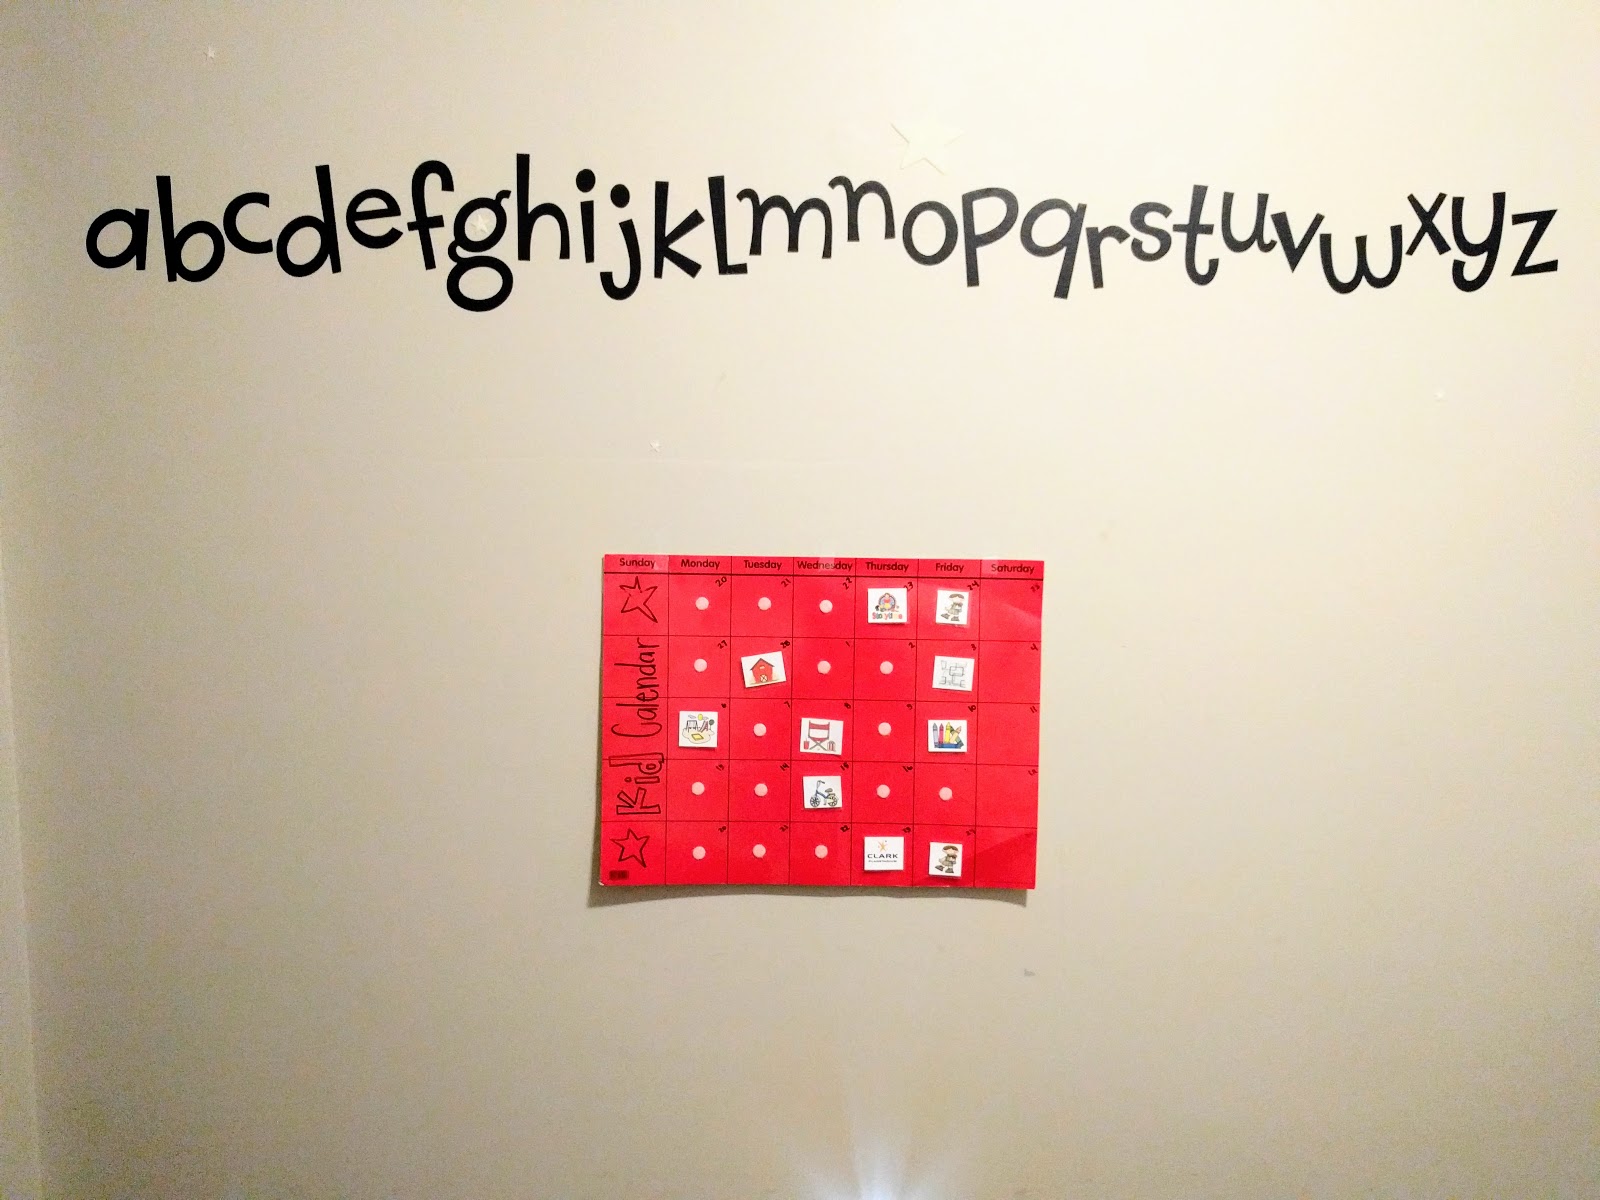
Kid Calendar

I decided I sit at home and do nothing too much.  My kids are affected by it.  They get bored, they get frustrated and they don't get to let their energy out.  So, I came up with a plan that helps me stay organized and allows the kids to choose the activities.  It helps us both feel in control and gets us out.


Kid Calendar:
.Calendar (check Utah Idaho Supply or Lakeshore Learning or make your own from)
.Clip Art of various activities
.Self-Stick Velcro circles

..

1. Decide on what activities you're willing to do and what you think your kids will like.  For activities that are free or really easy (library, story time, bike ride, baking, etc.) I printed off several.


[I put mine in a word document and printed them]
2. After printing them off, cut them out "laminate" them with packing tape  (This is my go-to way of making things reusable without paying lots of money to actually laminate them).

3. Next, grab your Velcro circles and start placing.


[Stick, stick, stick]
4.  Now put the other Velcro side on the calendar.  I chose to do Monday-Friday as Sunday is our day of worship and Saturday we are usually cleaning or doing house chores.


5. I put all my activities in a jar.  My calendar has 5 weeks on it so I let me kiddo pick 10 out of the jar (2 per week).

[I also took a dry erase marker to the calendar (it's actually laminated) and wrote the dates on it]
 Once he had all his choices, I let him choose what days to put them on.  Some (like story time) had to be on certain days since they're not offered every day of the week so we put those on the first and then filled in the blanks.

[apparently he likes doing things on Friday:)]

Now we've hung it in his room where he can see it every day and remind me what activities we have planned.

This has really helped me as I'm a planner and like to be prepared, and it gets him excited for our outing or activity.  He looks forward to them and I am too.  Today we hit up Wheeler Farm.  It was muddy and snowy, but we still had a good time!

Hope this helps you if you feel in a rut with your kids and activities...or just need a little nudge to get out there and do something:)

Happy (kid) Crafting:)

Total Time: 20 minutes
Total Cost: $7 (I already had the calendar)