Showing posts with label home. Show all posts

Monday, November 20, 2017

Easy Envelope Pillow Shams


I made a couple of these shams a few years ago, but have since bought another pillow...thus I needed to make another sham.  I searched my old posts to see where my tutorial was...low and behold I never made one.  So I decided to now.  I've seen a few online, but I don't like to cut or sew more than necessary and all the tutorials I saw started with three pieces.  Mine starts with one.

My pillows are 20" x 20" so I cut my fabric 21" x 50" 21" (one side) + 21" (the other side) + 8" (fold over portion)


After this I created a 1/2" hem by folding it twice over on both of the long sides

Then I sewed all the way down these on both sides

Once I did this, I made that same hem on the short ends & sewed them down


Alright, now I had a piece of fabric that was long and all hemmed.  Then I folded it in half (hotdog)

Now I unfolded one side up 10" (to 30")

Then I folded the other end down 10" (to 10")


So now I had my sham the size it needed to be with the fold over fabric centered on the back.
I don't use pins very often when I sew, but I did pin the points of intersection for two reasons.   One-so I knew where they were to keep it even on both sides and Two-so I could make sure to sew carefully over them as they were much thicker than the rest.  

Next I sewed just down those two edges of the hemmed portion, not along the folded edges.

Now, you can flip it and be done, or you can add one extra embellishment, which is what I did.  I flipped the whole thing (right sides out), ironed it and then did a quick little 1/4" hem around the entire thing.  

Now you can put your pillow in and add ribbon or leave them plain.


I added some wired ribbon I found at Jo-Ann.  I really love how they turned out.  I'm kind of obsessed with the ticking fabric (if you haven't seen my Stocking tutorial, I used the tan ticking).


I'm kinda loving how they turned out.  I love the simplicity of the ticking, but added the red ribbon for just a little more color and accent.  I love that they bring just enough red against the Christmas tree.  I love that I can use them for other holidays throughout the year.  And, I love that I got to make them.

Total Time: 1 hour
Total Cost: $23
Fabric: (2 yards with coupon, even though I have tons of extra) $15
Ribbon: $8 (didn't have a coupon)


Tuesday, November 1, 2016

Faux Fireplace Log Stack


I have been dying to make this for a few months now.  I love my fireplace, but we've had a standard grate over the front of it and it just wasn't cutting it anymore.  First off, our fireplace is a corner fireplace so a standard grate didn't really fit.  Second, with two boys it was always getting knocked over.  And third, it just didn't look cute (I know, I know....).

I thought about just putting some pretty logs in it to make it look nicer, but then it's still not safe.  We have the metal log holder (I don't know the actual name of it), and there are always footballs or soccer balls or cars landing in there (again, a house with boys...).

I decided I wanted to cover it.  I finally found this cute post and decided I was going to make my own.

Luckily, my dad was cutting down one of his aspen trees.  I asked him if I could take the wood, he said yes!  Yay-free wood!

I measured out the front of my fireplace and the side of it.  Since it's a corner fireplace, I decided to do faux logs in front and actual logs on the side.

[all my wood ready to go]
I measured my wood 16" and started cutting enough logs to fit up the side of the fireplace.  Once those were cut, I had him cut pieces that were about 2" long for the front facade.
[measuring my logs for the side]
getting ready to cut it all

[my awesome husband cutting all the wood]
[logs for the side]

[small pieces for the front]
 All done cutting!  Look at all that wood!!


I let it sit out for a week or so to help it dry out.

Okay, now it was time to put it up.  I used a 1/2" thick MDF board that my husband measured and cut to fit both the front and the sides.  Then I sprayed them both black.


I didn't really care how good these looked as they're being covered with wood, but just enough black to look dark.

Next I placed all my short pieces on how I wanted them & glued them with wood glue.
Getting so close to being done.....

Next I stacked my logs how I wanted them.  Now this got a little tricky...


I then taped the ends of the MDF board where I could see the center of the log (where the log was closest to the board)...

Then we used the drill press to drill holes into the board.


Once the holes were all drilled, we flipped the logs over so the fronts were facing down.  We put the MDF board on top, black facing the logs and started screwing the logs into place.


three of them done...so cool

We put both pieces into place and screwed them together with black screws and voila-it's done!

[Here you can see the front from the side before we put the two pieces together...]


It is a lot of wood and a lot of logs, but I'm so happy the way it turned out!  Grateful my dad let me take the wood and grateful my husband was so willing to help me!

Happy Crafting!

Total Cost: $15?
Total Time: a lot:)

Saturday, July 16, 2016

Quick & Cheap Closet Organization

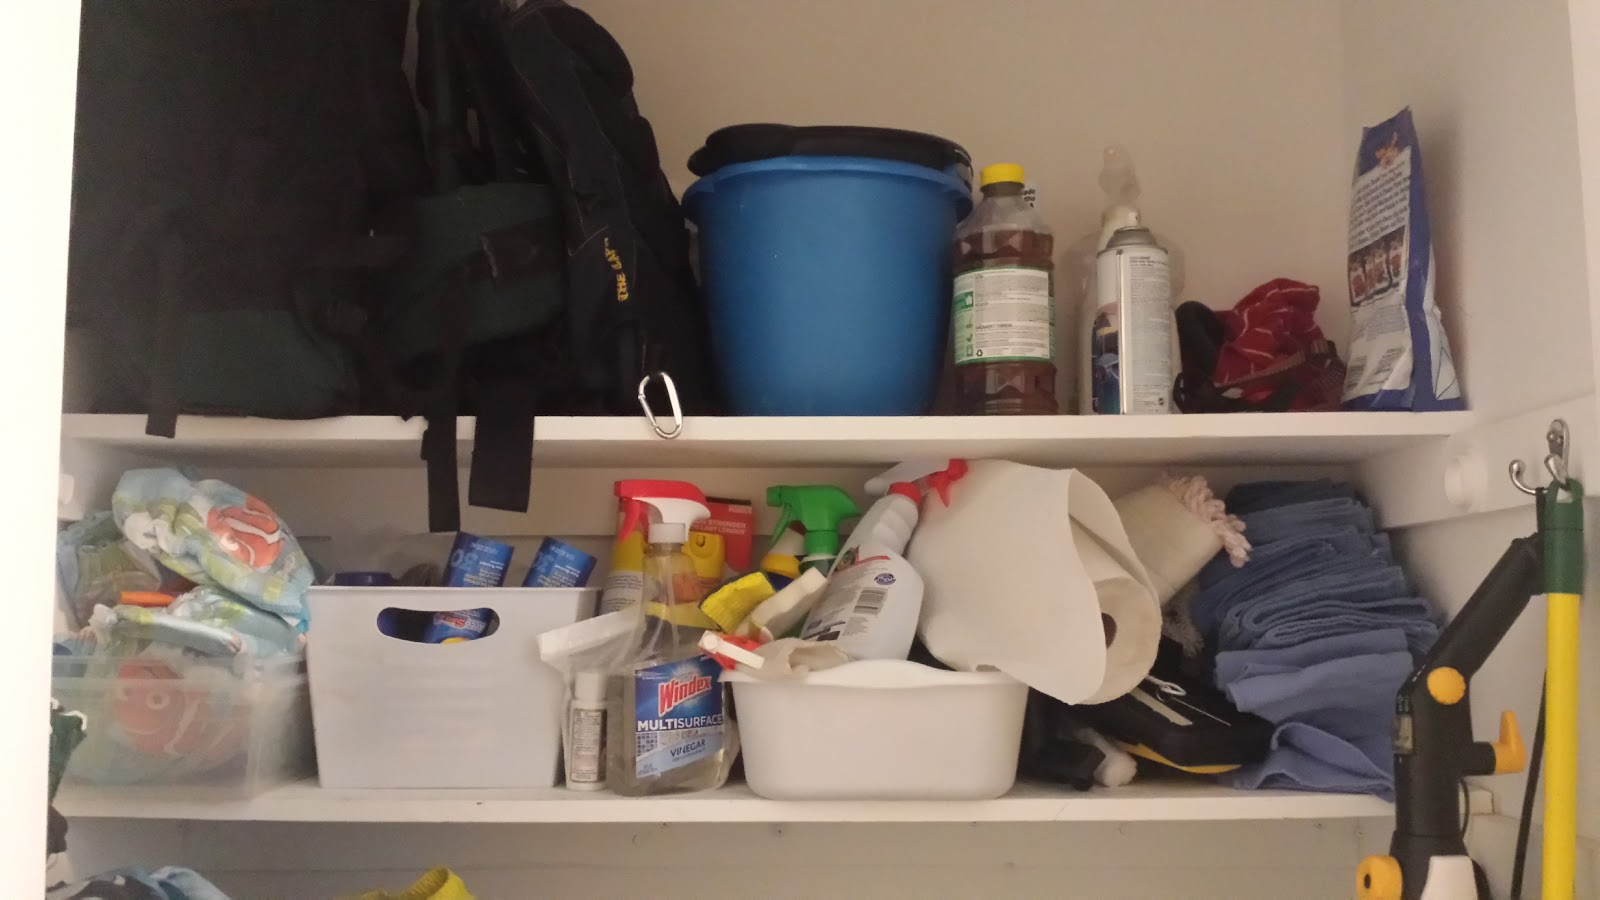
My cleaning closet is a mess!  I've got swim stuff in there, cleaning supplies, dog treats, emergency stuff and a ton of other stuff in there.  I use all of it a lot, so it's nice having the closet right off my kitchen, but it definitely needed some organizing.

As you can see, it's a disaster!

So, I pinned a few things and went to work.  I headed to my nearest dollar store (Dollar Tree) and picked up some of these for under $10.

I liked these because they were more oblong, which I knew would fit better on my shelves.

Then I created some cute tags in Word: 
[aren't they cute?  I love this font (KB Hold the Phone) & the border matches my kitchen colors]
I printed them out on cardstock and "laminated" them using packing tape.  Easy!

I tied them to each basket with some brown twine (super cheap), but you could use decorative/crafting twine too.

Then I put everything in its corresponding basket and voile!  A clean, organized closet!
I feel so much better when things are (a) organized and (b) cute!  It makes me actually want to pull the baskets out and clean something:)
[now everything is in its proper place]

[it still might look a bit cluttered, but it's SOO much better!!]

Happy Crafting!

Total Time: 30 minutes
Total Cost: $9