Showing posts with label under $20. Show all posts

Thursday, December 8, 2016

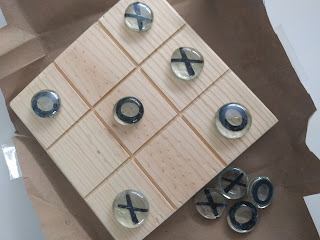
Easy DIY Tic-Tac-Toe

As you might have figured out, my grandpa has a wood shop and I love spending time with him there.  It's fun to take a slab of wood and create something fun along with lasting memories.  Each year I try and make a few gifts for family or friends with him.  A few years ago, I made these boards and they were the easiest thing I've made.  Seriously, a few cuts and some sanding and that's basically it.  And they are cheap too, so I thought I'd share.


What you need:

One (1) 1" x 8" x 8' board
Glass beads (or something to use for the "x"s and "o"s) & letters

[tools]
sander / sand paper
measuring tape
saw (we used a table saw)


1. Grab a 1" x 8" board from Home Depot like this, it's about $10 but you can get 12 boards out of it
2.  Now cut the whole thing down to 1" x 7" 


3.  Now cut 7" squares so they look like this:


4.  Alright now you're going to cut 4 grooves.  We practiced on a scrap piece of wood to get the depth right, 1/8".  We used a table saw, but you could use a hack saw.


These grooves are going to be cut at 2 3/8" & 4 5/8" (or simply 2 3/8" from the outer edges)


5.  Turn your board and make two more cuts/grooves.
6.  Don't forget to sand it, just to smooth it a bit, get all the sharp edges/slivers off


7.  Now for your "x"s and "o"s.  I bought these clear beads from The Dollar Tree and cut out the letters on my Cricut using black vinyl.  The options here are really endless...you could paint them, use marker, use something else completely. 


Now play a couple games ... just for fun:)


Wrap it up


Throw the "x"s and "o"s in a bag or something cute & fun


Then tie it all together with some festive string or ribbon


And there you have it!  Super easy gift, cute and fun for the whole family!  And... super cheap too!  Less than a buck for each one!  I love how these turned out!  And like I said, the possibilities are endless...you could stain the board, paint the board, make different "x"s and "o"s, whatever your little crafting heart desires!

Happy Crafting!

Total Time: 1 hour
Total Cost: $15 ($10 for board, $5 for 5 bags of beads)


Tuesday, September 27, 2016

DIY Chalkboard Easel


I recently stumbled across the awesome duo of Whitney & Ashley of Shanty2Chic & love all their projects.  They've got great tutorials and such cute style!

I saw this cute easel and decided to make my own!  So much fun you guys, and so easy (with the right tools).  Mine is a little different than the one she made.

What you'll need:
2 8' 2x3 boards
1 set hinges
1 16"x24" chalkboard (you can buy a 2'x4' one at Home Depot and have them cut it into 3 pieces)
12 screws (and drill)
Paint/Stain
Sander

How to:

1. Have Home Depot cut the chalkboard for you, it's a lot faster and easier
2. Cut your boards.  You'll need 4 pieces 30" long and 3 boards 14" long:


Okay, so I caved and bought myself an early birthday present.  I'm so excited about it!  It made this project so.much.easier!  And it's actually really easy to use & small enough I don't need my husband to help me:)  I drilled the pocket holes using this Kreg Jig.  They've also got a bigger one for $140 and a smaller one for $40.  I would highly recommend this tool, I'm already trying to come up with more projects just so I can use this!!!

Back to the instructions:
3.  Drill your holes into the 3 short boards on both ends.  The Kreg Jig makes it super easy to do this...
It does all the work for you really, you pull the blue thing up until you get to the width of your board

Then you drill

and they come out looking great!
I was pretty proud of myself for doing it and I felt like a pro (or maybe just really cool that it looked like a pro did it)

5. Sand all your boards
6. Time to stain/paint/whatever you want.  On my kitchen table we used a grey paint to grey wash it.  We used a pint-size can and we only used half of it on the table.  I did the same color for my easel.  I really love the color of it and I think it goes great with the chalkboard!
Dip the paintbrush in the paint, then in the water, then brush onto the wood.  Let it sit a few seconds, then wipe it off with a damp towel.  Repeat the process until it's as dark as you want it)

It's coming together!

7.  Screw it all together!
These are the screws the kit recommended using.  It's great because it tells you what length of screws to use depending on the width of your board
It comes with a long drill bit to fit into the deep holes, so easy!

And there you have it.
8.  Attach the chalkboard. Whitney used a staple gun to attach hers, we used some screws for ours.  Either way works, just depends on preference really.


9. Time to put the back stand portion together.  I placed my middle board about 6" from the bottom (the chalkboard frame bottom short board is 3" from the bottom).


Once it was screwed together, I placed both parts face down and got ready to add my hinges.  I liked Whitney's idea of painting them black so I did.
These were what the original color was (and you only need one package)

Quick and easy to pain them (just put the screws into some cardboard and spray the tops)


Once they are dry, screw them in place and you're done!


Glad I did the two stands instead of one, much more sturdy and just a more classic look


chalkboard with screws, and those pocket holes...

see how well that jig works?  I mean, don't those holes look so professional ;)


Whitney added a string at the back of hers so it wouldn't open all the way, I will probably do something similar, but for now I am just marveling that I actually built this!

Happy Crafting!

Totals Cost: $17 (not including paint or screws/jig)
Total Time: 4 hours 


Thursday, September 4, 2014

DIY Burlap Stocking with Lining


I've wanted to make stockings for a couple years. Now that I'm in my permanent home & have the decor that I like I decided it's time to get going.  I decided burlap was the way to go.

I found a couple diy tutorials and started with those.  I used this site for the stocking template (I changed it just a bit).  I used this site & this site to help me figure out how to sew them.

I was having trouble, I'm not going to lie.  I wanted my lining to be sewn into the stocking, but I just couldn't figure it out until I found this site!  Totally saved me.  I even undid my not-so-great stockings and redid them so they (a) all matched and (b) were right.

Now for the DIY:

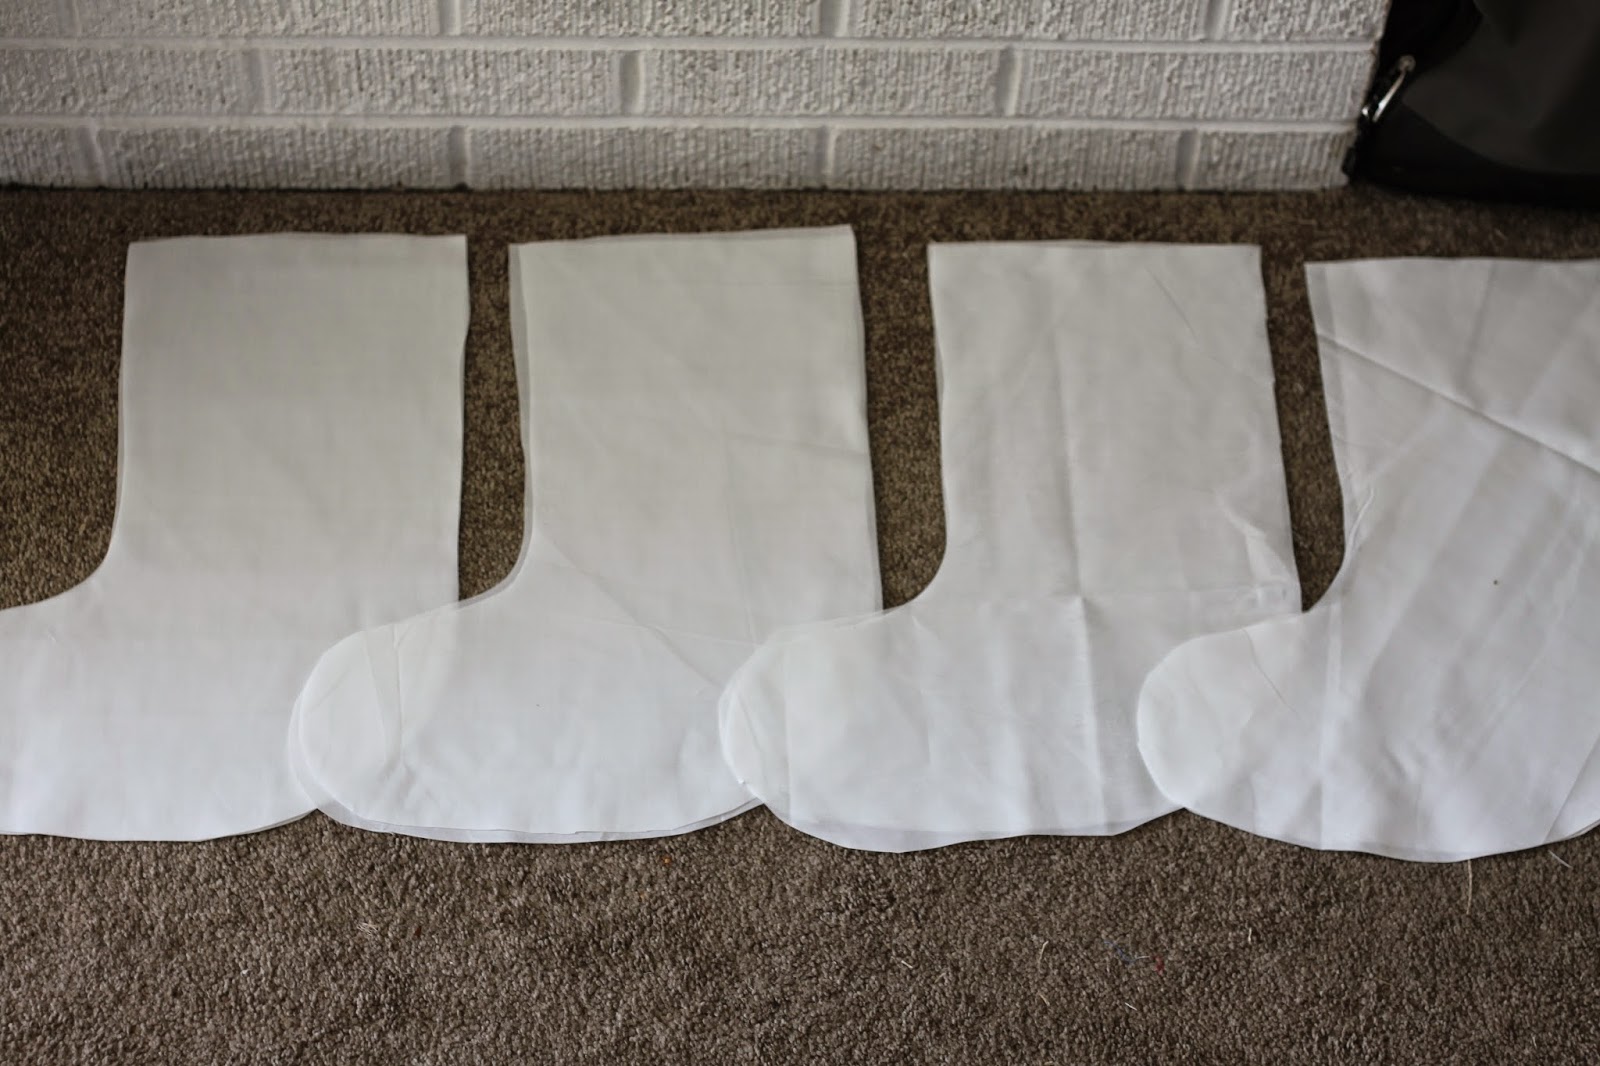
Again, find (or make) a pattern you like and cut out your stockings.  I bought 1 yard of burlap & muslin and got about 5 sets out of each.


Next I cut out my cuffs. I did 4" x about 8" (the width of my stocking top).  I sewed the cuff to the lining


 Then [I sewed the lining together & then the stocking together…save yourself some time] I placed the 2 linings on top of the two burlap pieces...
Make sure the cuff is out (right sides together).    


Make sure to overlap the burlap with the cuff about 1/4"as well

Sew around the edges, but not the top, only the sides (including cuff) & bottom

Should look something like this when you're done

cut around the corners/rounded areas to allow movement


cut extra material off to reduce bulkiness when turned
Now the fun part...

This is what it should look like...you're going to turn it right sides out...from the lining so the lining will be o

Alright, now that the lining is on the outside (looks like a nice white stocking), pull from the inside again, this time between the burlap

This is what it should look like if you did it right, the cuff is inside out, but the burlap is right sides out:)


Now stitch along the top of the stocking, leaving the cuff still out

Hem the end of the cuff

Now the cuff & the top of the stocking are stitched, it's time to fold the cuff over
Ta da...

Almost done...now for the loop..


See how the lining is clean (right sides out) and so is the stocking


Sadly, this is what took me so long to figure out....until I found that tutorial.  I had three stockings that were not right...had to un-stitch them all :/

Now for the hanging loop.  I've kind of been obsessed with grommets & twine (and this fabric if you've read previous posts).


Found the back of the stocking where I wanted to put the grommet

Using this tool (found online or at local craft store), use the small part against the metal punch

Place it on the designated spot & push

...hard.  You should hear/feel it go through the fabric

It should leave a little hole going all the way through.  Use scissors if you need to
Grommets...two different pieces, the flat piece and the ... other piece

Place piece with the lip on the front (or outside) of the hole

push it through...

so it comes out the inside of the stocking and the edges are completely exposed

Place the flat piece on the inside, over the lip

Push & twist the white plastic piece so the larger end is over the metal piece

Place the metal part over the lip of the grommet, making sure it's as flat & even as possible

Press until you've heard it and it should look like this
Add some twine & there you go

Now you can see the grommet & the clean seams of the interior lining

Look from the back
Love the look

Love the grommet look

Simple stockings


 There you have it.  Hopefully that helps a bit with your Christmas stockings diy.  I still have to individualize them, but I still have a couple months...right??


The burlap & muslin I got at JoAnn's for about $4 a yard.  I bought 1/2 yard of the cuff at $6.29 a yard.  Already had the twine & grommets.