Wednesday, May 13, 2015

Wood Toys

If I ever opened an Etsy Shop it would be called "grandpa's wood shop" because I make everything in my ... grandpa's wood shop.  He has been working with wood since before I was born and is incredibly talented.  I like to do the same, although I'm no...where....near as good as he is.  Yet, I have to start somewhere.

I wanted to make some wooden toys for my kid(s) to play with.  Wood is sturdy, timeless and well, my wood toys come with memories and are a priceless heirloom.

I googled wooden toys and found several on Etsy, most of which were quite expensive (but considering how much time it takes to make one, I totally understand it).  Anyway, I pinned a few and decided to go ahead and make my own.

I bought materials at The Home Depot & Walmart (spent approx. $60) and started making my own patterns, tracing and then headed to my grandpa's wood shop.

The items I decided to recreate: herehereherehereherehereherehere and here.
Mine are different, but I love them just the same, maybe a little more since they are made from my own elbow grease and my grandpa's skill.


Fishing pole & fish:

 My grandpa and I slaved over how to make the hook (the one on Etsy was just too hard for an ameatur like myself).  My grandpa suggested a smaller dowel.  I like it.  I might update or make another/some more with magnetic fish instead of the dowel for younger kids, but I still absolutely love this little toy....and so does my little guy.


Jump Rope:

 My grandpa is amazing on the lathe.  I just absolutely love how these turned out.  Seriously.  The example I looked at is painted red, but I just love the natural look of this.  I might eventually have to make larger holes for thicker rope, but it's just right for now


Stacking Sorter


Again, I absolutely love how this one turned out.  It was actually super easy too.  I cut a 8' x 10" board and got a 4" x 10" piece for the base.  The dowel is I think 5/8 or 1/4 I can't remember.  The shapes are 1/2" plywood (which I might recommend not using plywood, but actual wood).  Again, the one in the example is NOT painted, but I liked the idea of adding some color for interest.


 Lacing Toys:


Again, this toy is so much fun.  We did it out of the 1/2" plywood (which it was pretty messy to sand), but I love the thickness.  I made patterns for the holes on my templates so they are evenly spaced and my grandpa used his drill press to drill all the holes.  After some (lots of) sanding and smoothing, I think they turned out pretty cute.


 Bowling Set:


I had to order the ball online.  I found 3" balls on Ebay, 8 for $10 free shipping.  That made me happy and they are just right.  The pins are 8" tall.  My child is obsessed with bowling.  Anytime we drive past a bowling alley, he begs to go.  It's kind of strange and funny at the same time.  Anyway, we have a plastic bowling set, but I love now that we have a wooden one too.


I showed my sister my idea for these crafts and she wanted her own set so I was able to get two sets out of the wood and supplies I bought.  I still have a few more things to make, but I just love that my kids will have something special to play with as they grow up.

Made with love.

Total Cost: $65
Total Time: 10+ hours

Denim Patchwork Quilts

When I was updating our "dump" room into a kid's bedroom, I decided to add a few handmade items for a bit of charm.  

Denim throws were what came to mind.  Easy, pretty cheap (considering how much you could pay for these online), and fast.  

 I went to a local thrift store and bought the cheapest, biggest jeans I could find.  These were size 50 and cost $17 for all of them.  I made sure they didn't have any holes and weren't too worn that they'd fray or rip.

Wash them in HOT water to and then start cutting.

I wanted my finished squares to be 9" so I cut 9 1/2" squares to allow for seam allowance.

Once I had all my squares cut out, I placed them in the order I wanted them and started sewing

I sewed the blocks in rows (4 across), then sewed the rows together.  It really took only a couple hours maybe (I got most of them cut and sewn while my child was napping).

Once I had them sewn together (I kinda stopped taking pictures, I always do that).  I bought a single twin flat sheet (navy) from Walmart for less than $5.  I bought 2 yards batting at JoAnn's that was $5.98 a yard, so again, pretty cheap considering.

Place the batting on the denim (right side facing up/the batting), then the sheet on top of both (right side [if there is one] facing down/again, the batting).  Pin and cut around if needed

Now, sew along the edge (leaving a 1/4" hem).  Leave about 8-10" unsewn so  you can turn the quilt right sides out.

Once you've turned it, it's time to "quilt."  I just followed the squares and did some "ditch sewing" (or whatever the proper name is).  Seriously, this took me maybe 2 hours to do (luckily my grandmother has a Bernina and also watched my child for me).

Done.


 I didn't add a binding or border, these were pretty basic.  But I still love how they turned out; they give just a little bit of warmth and coziness to the room.


Total Price: $35 for both (so $17.50 each)
Total Time: 4-6 hours
Wednesday, December 3, 2014

Christmas Crafting...

I found this fabric early this summer and kind of fell in love.  I used it,..a lot.  First I made a lumbar pillow then had my mother-in-law make a throw for the bed...then I made burlap stockings with ticking for trim.  I made a lamp cover for my bedroom light, and I'm sure I've put it elsewhere in my home.


Well, being the Christmas season I wanted to make some Christmas covers for my pillows (my living room definitely has more of a summer, beachy feel.  Let's admit basically my whole house is going by that theme).  So, what did I do...I found the ticking fabric in RED


So, I made some easy pillow covers.  These are great because I can slip them on without having to unstitch anything, they are great!!  I didn't follow any tutorial or pattern, I just kind of figured it out by myself, but this is basically the same as what I did.  Seriously, SOOO easy (one piece of fabric, hems and two stitches and you're done!).  I probably did the two in less than 30 minutes!  


I threw those covers on my pillows and thought they looked good, but not finished, so I tied a red ribbon around them.  There.  Finished.

Now, for my lumbar pillow.  I was going to do grommets (like my original lumbar pillow), but didn't have enough.  So, I did a big stitch along the ends so I can uncover it easily.  Again, done with the sewing, but the pillow just wasn't finished.  I didn't have any more red ribbon...so I used what I loved almost as much as that ticker fabric.  TWINE!  Now, don't buy the expensive craft twine, head over to the hardware section of Walmart & get the twisted jute twine ...190 feet for less than $2.

Anyway, I tied some twine onto that pillow and voila, done.  


Now for the stockings.  I spend an bundle at Target trying to find the right stocking holders.  I don't have a mantle, I have a picture shelf from Ikea.  The downside is it has a lip, so no stocking holders fit.  I was racking my brain trying to figure out what to do when I remembered how the stockings were hung at my house growing up.  Eye hooks.  You can get them at any hardware store for pretty cheap.  Easy to put up & hardly noticeable.


I debated on how to individualize each stocking.  Do I sew a letter on each?  Add a letter hanging?  I decided to add the letter hanging would be easiest.  I bought the letter at Walmart for less that $2 each,  Originally I painted them silver, but it totally clashed!  So, I spray painted them white.  Much better.  I used my favorite twine to hang them originally, but when I had extra ticking fabric.  I totally had to use it.  I made these and absolutely love how they turned out.   I think the stockings are my favorite part! 


Next are presents.  I have always loved the simple brown paper & silver bags to wrap presents.  It's timeless, yet simple.  Once again, my fetish with twine took over and I added it to the presents.  I had this red metal star that had jingle bells on it.  They were coming off and I thought, "What the heck, let's add a little embellishment."  So each present got one [plus it masks the sound if anyone tries to go snooping].  I love how they turned out.  When I ran out of red, I just bought some small ones at JoAnn.  They were on clearance so I bought two packs.
The letters are just white vinyl.  I stole this idea from a friend, you can use vinyl, cardstock, regular paper, whatever to do this.  I cut them out on my Cricut, using the Classic Cricut Font.  Love how they turned out.

Now for a few more decorations. I had just a bit extra of the ticking fabric, so I added some here to pull in the lamp table.  I added the star to give it a little more festivity than just the monkey knots...


My rocking chair looked a little bare.  It needed some red ticking fabric too...


I still think this piece needs a little something, maybe some cute red or tan buttons in the corners or a red ribbon?  Not quite sure yet.


And with the little extra ...
Can't forget the door

And just for fun, the trees I spent HOURS on last year.  


And you have to have a place for all those Christmas books.  I am SO SO pleased with how this bookshelf turned out.  My husband built it the beginning of this year & I absolutely love it.  He is amazing!!!


 And the tree....you can't forget the tree, the child gazing and the train chugging around it.

Merry Christmas!  I hope you enjoy the season with your loved ones! 

Tuesday, November 4, 2014

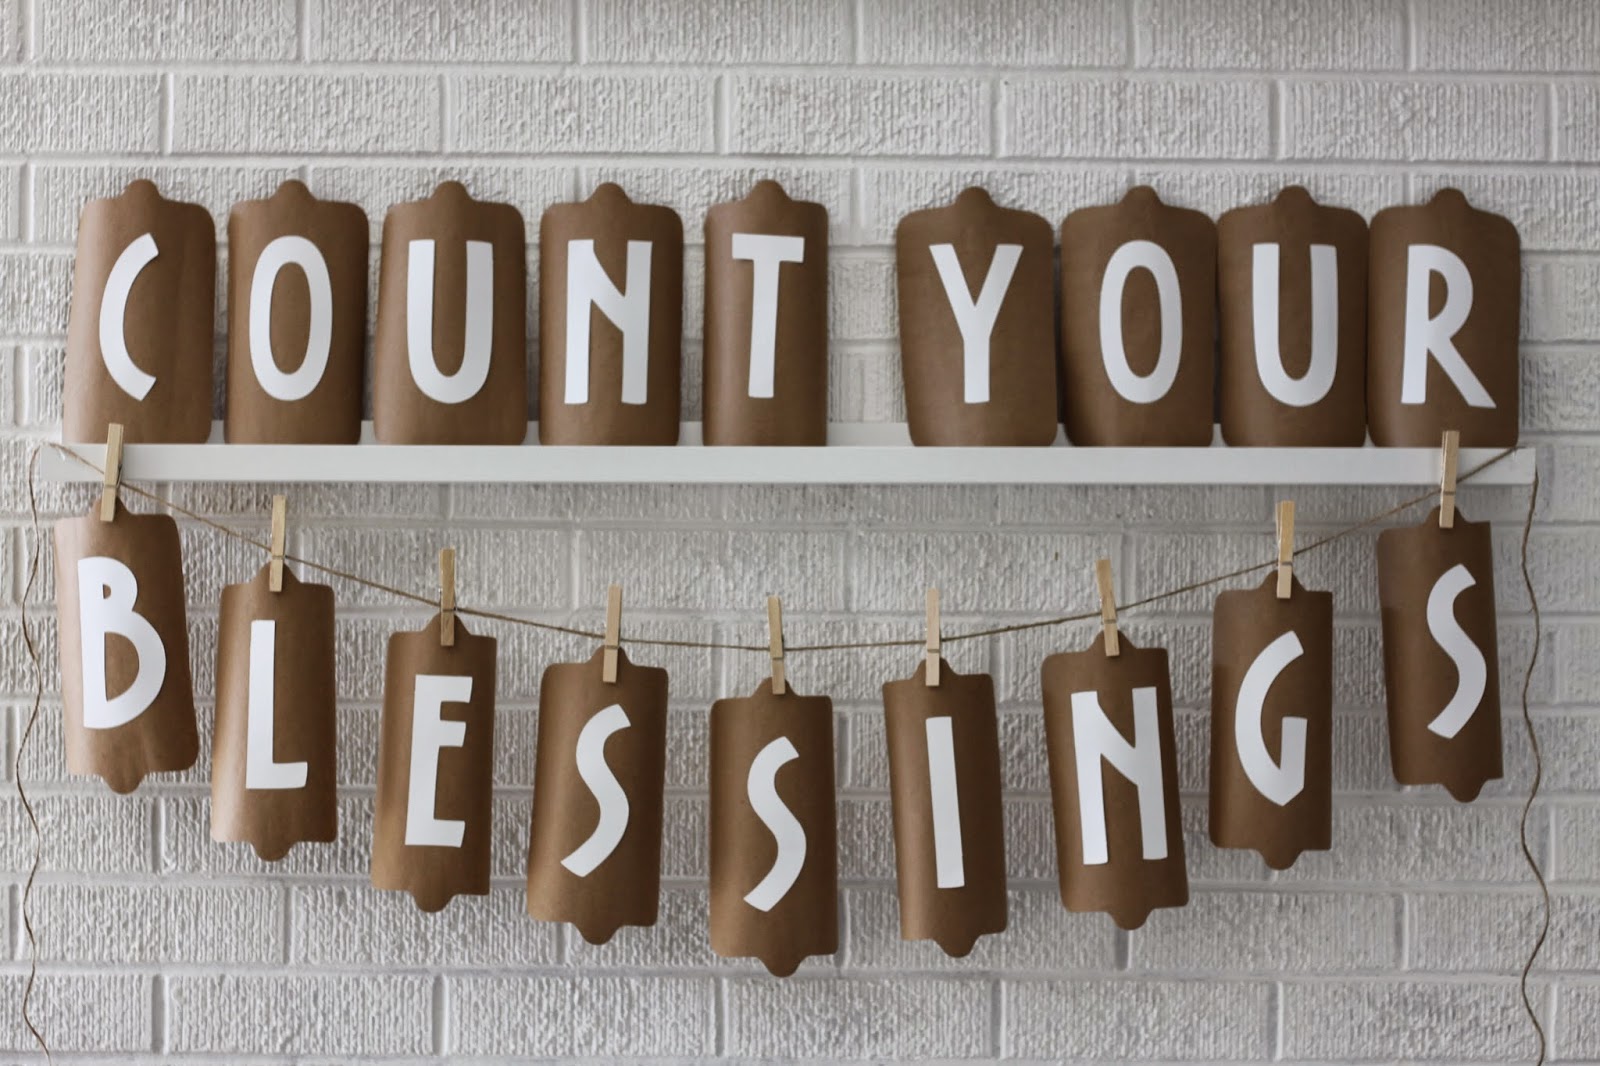
Thanksgiving Banner

Time to put away Halloween & give Thanksgiving some time.

Really, I left my wood pumpkins & candy corn since they are fall decor.  I needed something more though...something simple yet decent.

A banner.  I wanted something faster & easier than burlap, so I thought I would just do card stock.  I rummaged through my scrapbook paper, but didn't have enough of anything but white.  I remembered I had a roll of kraft paper (the heavy brown wrapping paper that they use at the post office).

I used my Cricut to cut out the base shape & words (Cricut Essentials "label 1" and Opposites Attract "Opposite" for the letters).

The brown bases were all a little rounded from being on the roll.  At first I didn't think this would be great, but it turned out to actually be in my favor.

Glue, twine & clothes pins later....


So, there you have it.  I like how they ended up being a little rounded, it gives them a more 3D look * helped the "Count Your" stand up better

Materials:
twine
scissors
paper (card stock or your choice)
tape or glue
tape (for hanging)


Like I said, I used my Cricut machine, but you can easily create or find a template online & cut it out...same with the letters...it will just take a bit more time.

Total time: 1 hour
Total cost: FREE