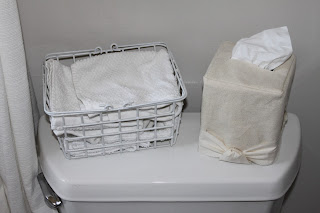
So, I decided to make my own. It wasn't too difficult, but I did have to pick some seams and try again.
 |
| End result |
 |
| I used an empty milk box from Costco...I cut the bottom into 4 pieces that would be the sides of my box... |
 |
| Yay! The hole was already cut for me, I just centered it and cut to make the top piece |
 |
| Once I had my four sides and top, I placed them around an actual Kleenex box and taped them together |
 |
| Then I taped the top on...and covered the whole thing with tape. I then cut the tape over the hole and pushed it in, so the sides of the hole were smooth |
Okay, here's where the pictures stopped. I was going to just mod-podge some cute paper on, but then I decided I wanted a little sturdier box, so I grabbed some scrap material I had lying around. I measured the top of my box and added about 1/2", then I measured all four sides of the box and added a couple inches to the width, then added an inch to the height.
I hemmed the bottom edge of the piece that would go around the sides. Then, I cut a hole in the top piece, folded the edges over and sewed a border.
Then, I took that top piece and placed it on the piece for the sides. I sewed along one edge, and when I got to the corner, I left the needle down, turned the TOP piece to have its edge match the edge of the side piece (make any sense?), then I continued sewing.
When I got all the way around, I had just enough fabric left over to sew the sides together.
Mine ended up being just a tad short, so I found another piece of material lying around that matched and tied it around the bottom...I think it gives it just a bit more character.
Here is the end result.
It's not perfect, but for a rookie and not reading any tutorial, I think it turned out quite nice. And now I have a nice cover, so no matter what the Kleenex box looks like, I can always cover it up.
Total time: 2 hours (would've taken a lot less time had I known what I was doing).
Cost: Free


No comments:
Post a Comment