Saturday, July 16, 2016

Quick & Cheap Closet Organization

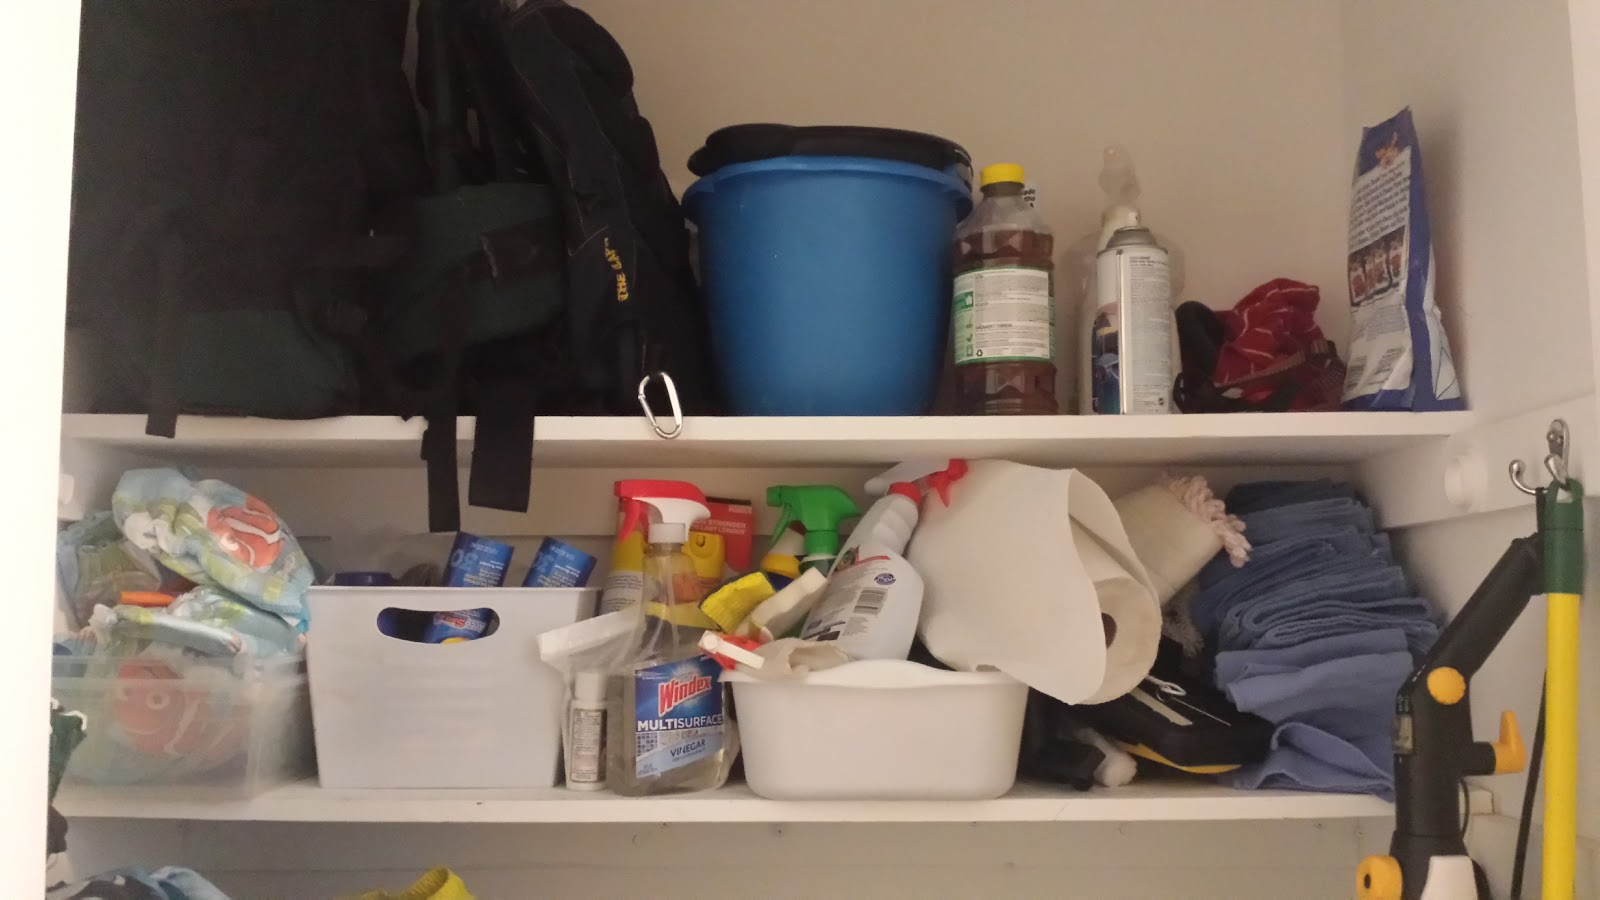
My cleaning closet is a mess!  I've got swim stuff in there, cleaning supplies, dog treats, emergency stuff and a ton of other stuff in there.  I use all of it a lot, so it's nice having the closet right off my kitchen, but it definitely needed some organizing.

As you can see, it's a disaster!

So, I pinned a few things and went to work.  I headed to my nearest dollar store (Dollar Tree) and picked up some of these for under $10.

I liked these because they were more oblong, which I knew would fit better on my shelves.

Then I created some cute tags in Word: 
[aren't they cute?  I love this font (KB Hold the Phone) & the border matches my kitchen colors]
I printed them out on cardstock and "laminated" them using packing tape.  Easy!

I tied them to each basket with some brown twine (super cheap), but you could use decorative/crafting twine too.

Then I put everything in its corresponding basket and voile!  A clean, organized closet!
I feel so much better when things are (a) organized and (b) cute!  It makes me actually want to pull the baskets out and clean something:)
[now everything is in its proper place]

[it still might look a bit cluttered, but it's SOO much better!!]

Happy Crafting!

Total Time: 30 minutes
Total Cost: $9

Friday, May 6, 2016

DIY Magnetic Dry Erase Command Center


I have tried several different things as far as "command center" goes.  The best I've come up with is this 8 week meal plan.  I made it when my husband started working night shifts at the hospital.  It helped us both remember what nights he was working & helped me plan meals I could fix between me getting home from work and him leaving for work.  Now, it still helpful looking ahead and trying to figure out grocery shopping.  I can plan weeks in advance (and as you can see with the smiley face stamps, I've been pretty good at sticking to it).  Less food is wasted, we eat healthier, we eat a larger variety of foods, and we eat as a family.  It's pretty much been a good thing all around.


Anyway, we've kept it on our fridge and it is the best place.  I've got my daily planner just around the corner with other things, but for the most part this meal plan is our go-to.  Well, I decided I wanted to spiff it up a bit and help  lean up the fridge a bit.  So I did.

I went to Ikea and bought this super cute (and cheap) frame....

FISKBO Frame IKEA Can be hung horizontally or vertically to fit in the space available.
And I had these little clothespins (I don't remember where I got them, but the package said $1).  And some mounting tape
Scotch Double-Sided Tape 1in x  50in:

(magnets were not strong enough to hold the entire board)

I originally tried to use tacky glue to attached the magnets to the back of the frame and the clothespins to the front, but it did not stick...grrr...   Then I tried wood glue, then gorilla glue.  Nothing!  GRRR!!  I realized the frame surface was too smooth so I ended up sanding where the clothespins were supposed to go.  As for the magnets.  I wanted the entire board to be magnetic.  It wasn't.  I also wanted it to be dry erase.  It (unofficially) was.  But how to do both.  The plastic insert of the frame worked for the dry erase, but was not magnetic.  After searching and almost an hour at The Home Depot, I ended up with a small piece of sheet metal for $5.  

Everbilt 12 in. x 18 in. 26-Gauge Zinc-Plated Metal Sheet
Luckily I had tin snippers at home so I measured it out and snipped away.  I placed the clear plastic down first (like you would as usual), then instead of a picture, I put the sheet metal, then the cardboard.  Then, I glued (with tacky glue) the magnets to the cardboard.  I used gorilla glue to glue the clothespins to the front of the frame.  And yay, with the sanding, they actually held!  Hallelujah! 


I loved how it turned out...and it was super cheap (although time intensive for trial-and-error). Now we have a place we can both go to for notes, chores, schedule, etc.

Happy Craftin'

Total Cost: $10
Total Time: 4+ hours (because of trial and error)
Monday, March 28, 2016

Easy Easter [or any season] sign


I'm trying to establish my seasonal decorations.  Some holidays I absolutely love (Christmas), but others are struggling.  I've slowly gotten rid of my college decorations and have started adding more refined, adult decorations.


I bought some flowers at Michael's while they were having a 60% off spring stem sale so I spent about $10 on those and I already had the vases (Ikea).

SOCKERÄRT Vase IKEA Can also be used as a pitcher. Approved for use with food.Ashland Jumbo Spider Gerber Daisy Stem, YellowFuchsia Spider Gerbera Daisy Spray by Ashland
The sign.  I wanted something significant, something that could stand alone and make a statement.  I found an extra piece of plywood sitting around and went to work.

Materials Needed:
Wood (I used extra plywood, it's soft enough to trace on)
Paint (acrylic paint, whatever colors you like)
Paintbrushes (I used foam paint brush and a small paintbrush for the letters)


1-I found a font I like and a saying I wanted.  I printed it off the size I liked [the font is "AlwaysHere" and the font is somewhere around 200, I did "He Is" just a tad smaller than "Risen"]


2-I painted my wood the color I liked.  Simple acrylic paint found at Wal-Mart for 50 cents!
Apple Barrel Matte Acrylic Paint, 2 oz
I used "Key West"

3-I placed my letters on the wood once the paint was dry and  traced over them with a gaming stylus


4-Then I retraced them just on the wood to make a deeper groove

5-I took a small paintbrush and painted the letters white.  Again, simple acrylic paint.


6- Once it was dry...done!   That simple.  Took maybe an hour (with interruptions from the littles)


And there you have it.  Simple.  Bold.  Elegant.  I love it!

Happy Spring everyone!


Total Cost:  $10
Flowers: $9 (on sale)
Vases: Already had
Wood: Already had
Paint: $.50

Total Time: 1 hour

Monday, December 7, 2015

$10 Christmas Manger

It was between Elf on the Shelf and The Giving Manger.  I decided I liked the idea behind the Giving Manger better, more service and Christ centered.

I liked how The Giving Manger had the cute book and it came with everything, but I couldn't justify spending $40 on that small of a manger.  I wanted it to be a focal point in my home, almost a centerpiece, since really, that is what Christmas really is about...Christ.

So , I thought about how I could ... make my own ... for cheaper.  I have a ton of those crates and thought I could make one out of those...Walmart didn't have any so I headed over to Michael's and used a coupon.  I got the crate for $8 something.


I was ready to get started:

Step 1-remove slats from sides and bottom


Step 2-remove nails

Step 3-pound in excess nails

Step 4-sand, measure

Step 5-nail together
I used these small nails I had on hand


I left one slat width at the top (about 2"), then started nailing together one side, then the next


One side I put the vertical slates on the edges, the other side I placed them on the inside (so if folded, they would fold together) 
This is of both sides, with the extra space at the top.  The top side has the vertical boards on the edge, while the bottom side has the vertical boards on the inside...kinda hard to see, but hopefully that makes sense)

Step 6-trace sides & cut (using a midor saw)
I looked at who wide I wanted my opening and traced on the end/side board  
Using a midor saw, cut along the lines 
Use wood glue to attach the ends to the sides

Let it dry...


Now I had to figure out what to use for "hay" and since I have a three-year-old boy, I didn't want to use actual hay.  I decided raffia was a good alternative.  Once again, I headed to Michael's and bought a bag of raffia with another coupon, $2.50.  I pulled it all out and cut it into about 2 foot pieces.

Now it's in a bag and every time my son does a good deed for someone else (or makes his bed, or puts away his toys or does something helpful), I let him put a piece of "straw" (aka hay) in the manger.


I know it's not perfect, but I like the rustic feel to it and it's the perfect size for my living room table.  I really like how it turned out, and it helps my family remember Christmas is about giving and not getting.


Merry Christmas!