I decided I wanted to make a really cute spiderweb for "pin the spider on the web" and went and bought two pieces of black poster board at Walmart for $.97 each. It was a lot of work, but turned out super super cute. But I think it's better as a decoration!
Supplies Needed:
1 black sheet poster board
Twine
Scissors & tape
Hole punch
1. I measured 12 stripes about 1" wide and cut them out
(1.b: I "laminated them with packing tape, not necessary but I wanted to make sure it lasted and I'm too cheap to take it to a store).
2. Then I punched a holes on both ends of them.
3. I strung the pieces together to form the center of the web.
4. Next I laid them all out and started making my round pieces. I tried to use a bowl, but didn't have any really big enough so I just kind of free handed them.
5. Then I punched holes in the ends of the round ones and punched two more sets of holes on the straight ones.
6. Time to string again.
There are two ways to do this. If you don't want your web to be able to collapse, you can string everything together, but if you want to be able to collapse it for storage, then you can just string one end of the round piece to the straight end.
I did NOT string the entire thing together (I wanted to collapse it for storing), so each piece is only connected on one side.
 |
| [see how they are only strung on one side? This allows me to fold it up when I want to store it] |
7. I taped all the unattached ends with masking tape on the back.

I love the twine knots at the intersections. It's super cute (I think).
I didn't know if it would be easy for the kids to keep their spiders attached to this one, so I decided I wanted to make a more simple one...
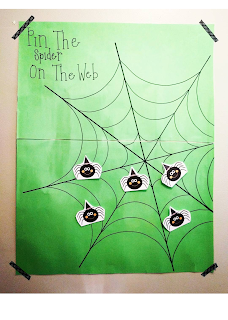
I saw a really cute "pin the spider on the web" here and thought that was pretty easy so I made my own. Super super easy & way cute too! It cost less than $1 and took maybe 20 minutes to make!
Supplies Needed:
1 yard butcher paper
Marker & Ruler
(Plates various sizes)
Tape
Paper spiders (I printed mine from the internet)
I went to Zurcher's and bought a yard of butcher paper for $.67. They had all sorts of colors, but I decided on green since it's my son's favorite color and kinda Halloween-ey.
I grabbed a yardstick and started making lines. I did 8 lines 36" long. Then I measured from the center and marked about every 3".
Then I took my plates and started tracing lines. I thought about doing freehand, but my ovals always end up lopsided.
Then I traced them with permanent marker
There you have it
I decided to laminate mine (about $6) just so I can use it over and over. And I found my spiders by just googling cute clipart. I printed them out on cardstock and then "laminated" them with packing tape.
Super fun!
Happy Halloween!


