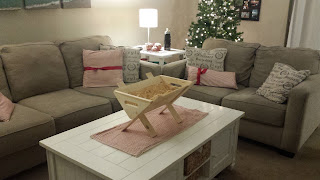
I liked how The Giving Manger had the cute book and it came with everything, but I couldn't justify spending $40 on that small of a manger. I wanted it to be a focal point in my home, almost a centerpiece, since really, that is what Christmas really is about...Christ.
So , I thought about how I could ... make my own ... for cheaper. I have a ton of those crates and thought I could make one out of those...Walmart didn't have any so I headed over to Michael's and used a coupon. I got the crate for $8 something.
I was ready to get started:
Step 1-remove slats from sides and bottom
Step 2-remove nails
Step 3-pound in excess nails
Step 4-sand, measure
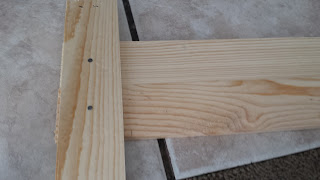
Step 5-nail together
 |
| I used these small nails I had on hand |
 |
| I left one slat width at the top (about 2"), then started nailing together one side, then the next |
 |
| One side I put the vertical slates on the edges, the other side I placed them on the inside (so if folded, they would fold together) |
Step 6-trace sides & cut (using a midor saw)
 |
| I looked at who wide I wanted my opening and traced on the end/side board |
 |
| Using a midor saw, cut along the lines |
 |
| Use wood glue to attach the ends to the sides |
 |
| Let it dry... |
Now it's in a bag and every time my son does a good deed for someone else (or makes his bed, or puts away his toys or does something helpful), I let him put a piece of "straw" (aka hay) in the manger.
I know it's not perfect, but I like the rustic feel to it and it's the perfect size for my living room table. I really like how it turned out, and it helps my family remember Christmas is about giving and not getting.
Merry Christmas!


No comments:
Post a Comment